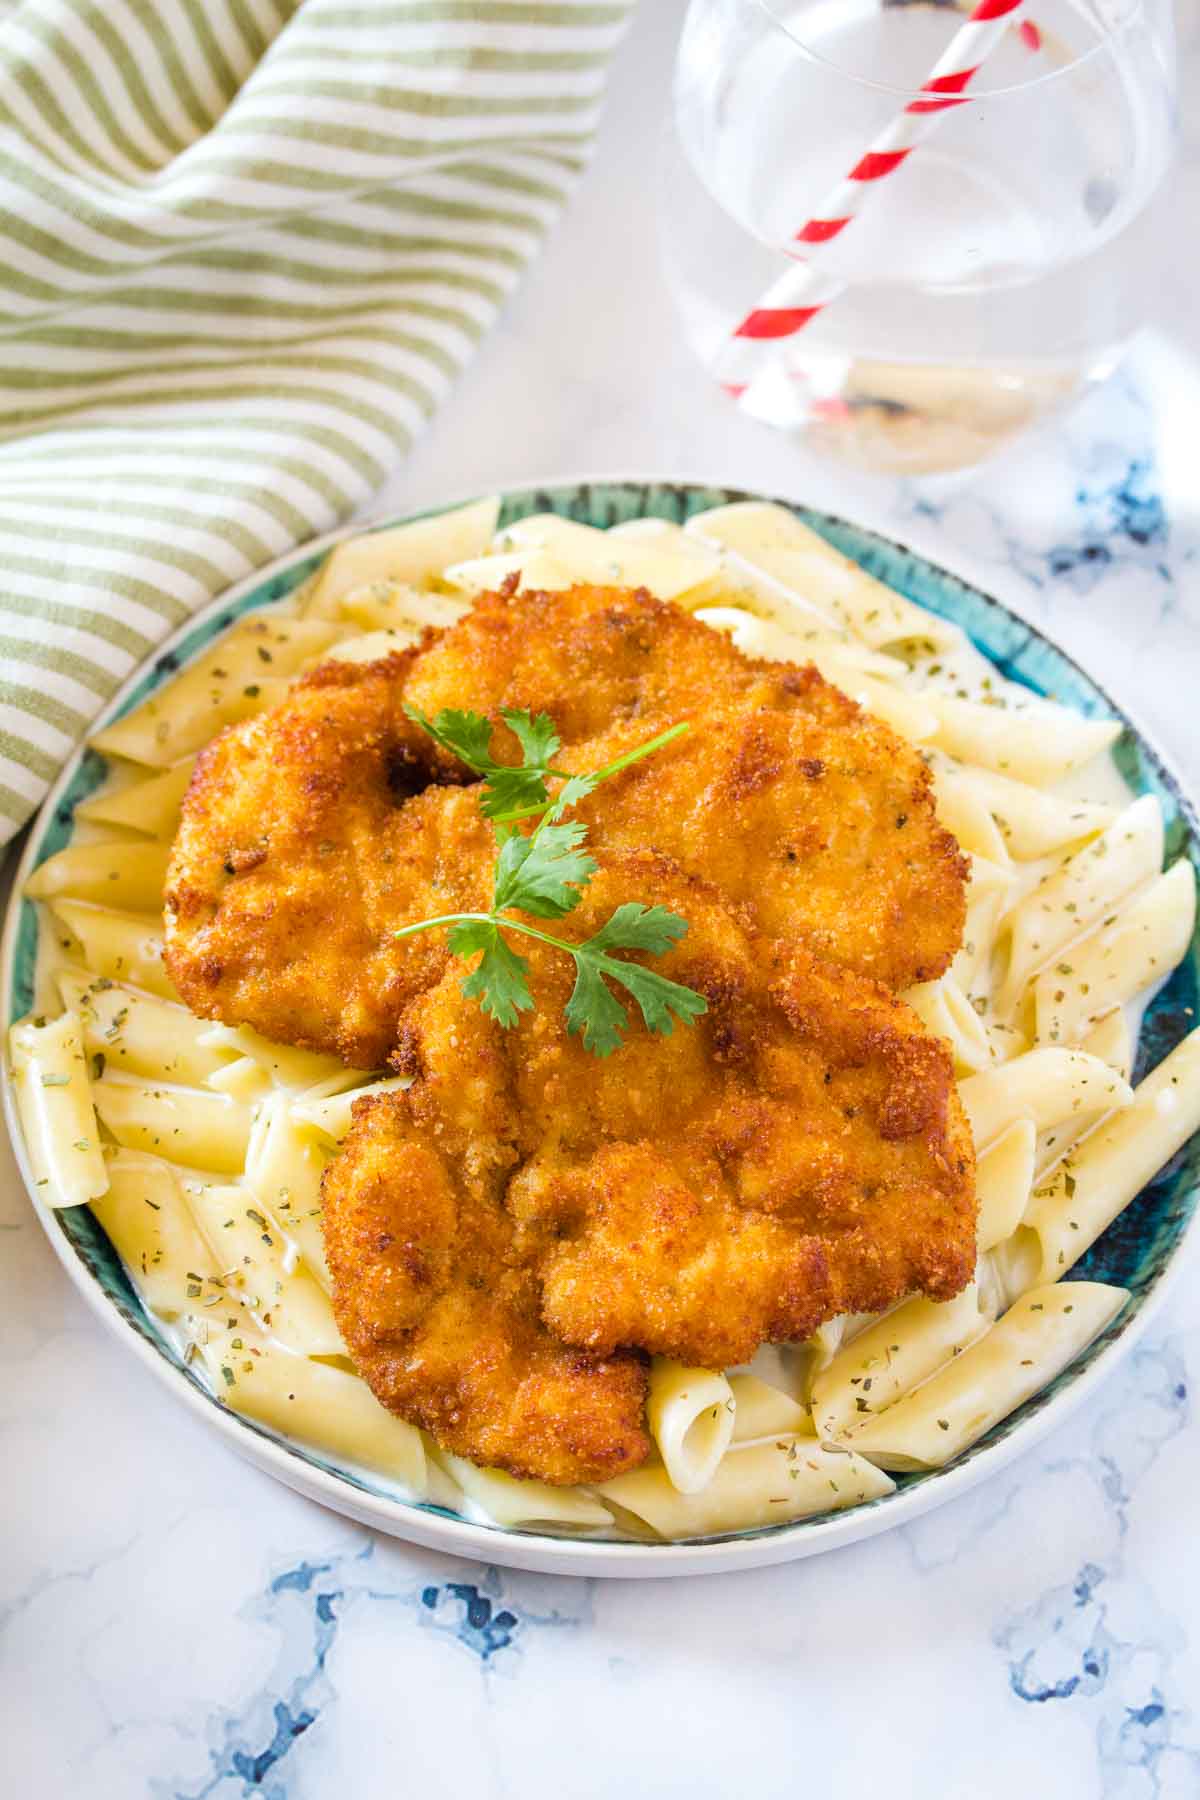
Crispy Breaded Chicken Cutlets are full of flavor because they're marinated with fresh lemon juice and herbs before being breaded. I've tested this recipe over the years, and can confidently say this recipe makes the crispiest cutlets ever, ready in just 30 minutes. Choose from three breading options, to make this recipe your own! Serve it with this delicious Creamy Garlic Pasta for a complete meal.
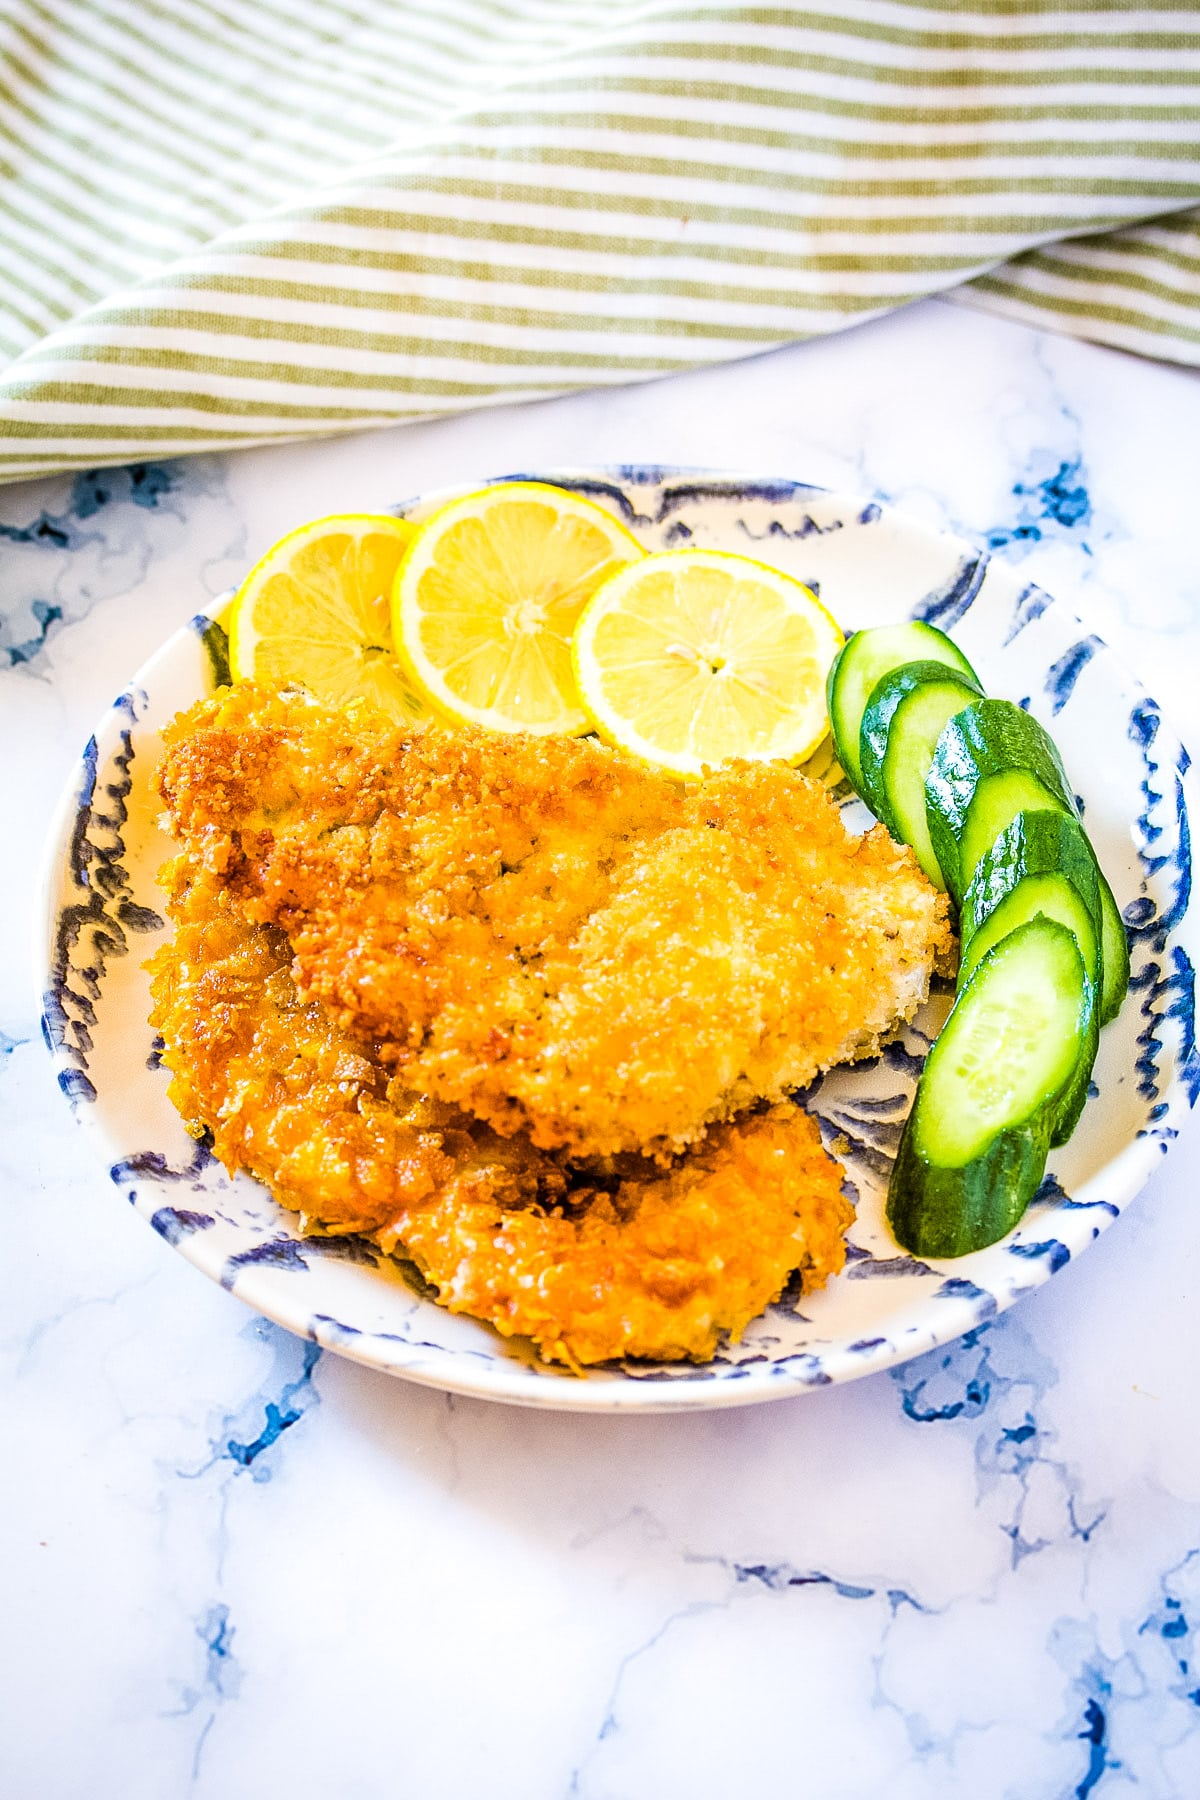
I love to pair this easy dinner with some creamy garlic pasta or this super fast veggie rice recipe. These cutlets are also perfect for burgers and sandwiches, or even to pair with this easy creamy summer macaroni salad. Make a double batch, and freeze (instructions in the recipe card) for busy weeknight dinners!
Jump to:
Why this Recipe Works
- Breaded chicken cutlets are one of my favorite quick dinners to make, because they are so versatile!
- I've developed this recipe over the years, and I've perfect it with lots of recipe testing.
- The trick to juicy, flavorful cutlets is to marinate the chicken first. I marinate mine with a simple mix of fresh lemon juice, dried oregano, garlic & onion powder, and salt & pepper.
- I then marinate it for 15 minutes, but the longer it's marinated, the more delicious it becomes. So if you have time, let it marinate longer!
- After that you just have to bread them, and either shallow fry or bake. Easy peasy!
P.S. My NUMBER ONE tip for crispiness is to place the cooked cutlets on to a cooling rack, instead of a paper lined plate, as this ensures the air will circulate around and there will be NO moisture or steam created which results in a not so crispy chicken.
Choose Your Breadcrumbs
I've tested this and retested this recipe with three kinds of coating. They all work, and they're all wonderful. My favorite has to be crushed cornflakes as they yield the crispiest cutlets, and they remain crispy for hours! You can use any option from below for this recipe:
- plain breadcrumbs
- panko breadcrumbs
- crushed cornflakes (if using cornflakes, place them in a ziplock bag first and bash with a rolling pin, this will help them be more uniform and adhere properly to the chicken).
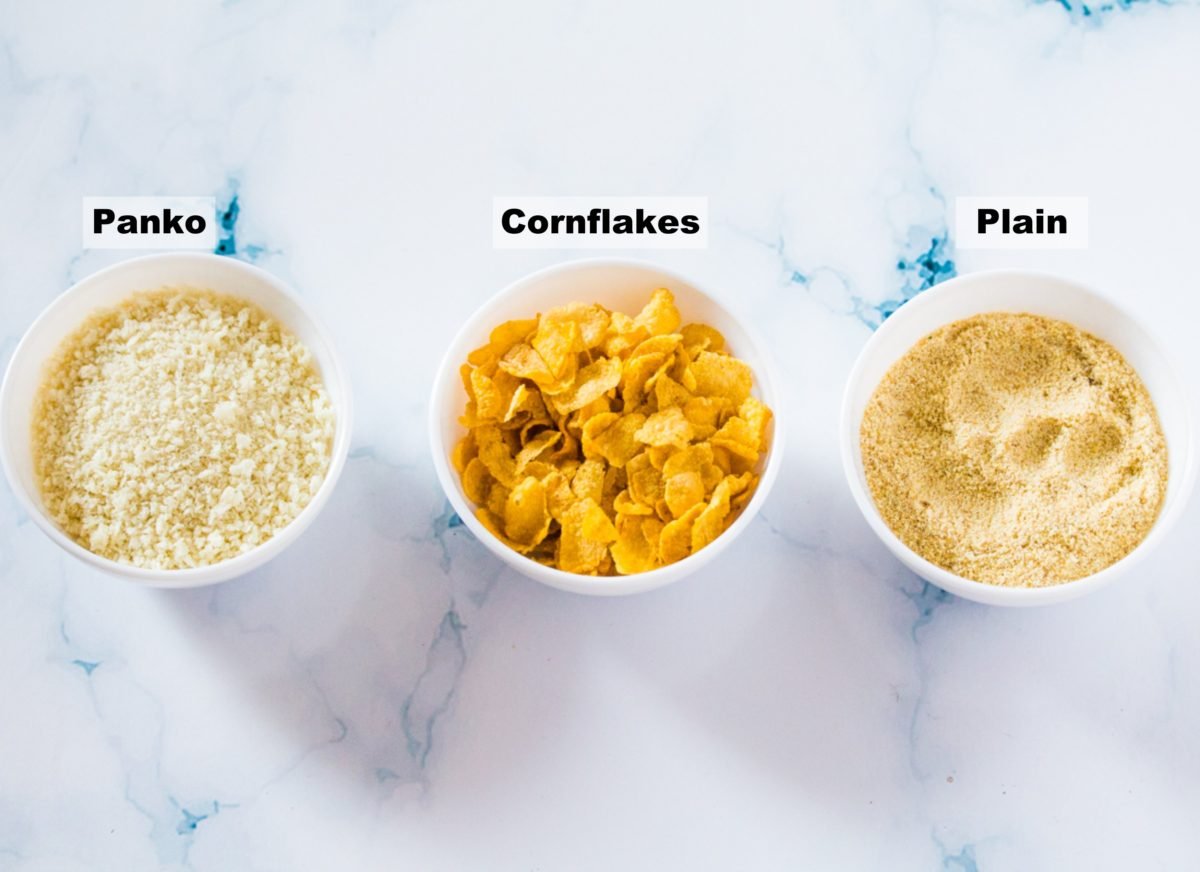
When it comes to crispiness, the winner was crushed cornflakes, followed by panko breadcrumbs. Plain breadcrumbs work great too, but flavor wise these are my least favorite of all three. They also tend to get soggy soon after frying.
Cooking Method: Bake or Shallow Fry
I've tested this recipe several times by baking and shallow frying the cutlets with all three types of coating. It always turns out great, and really comes down to your preference!
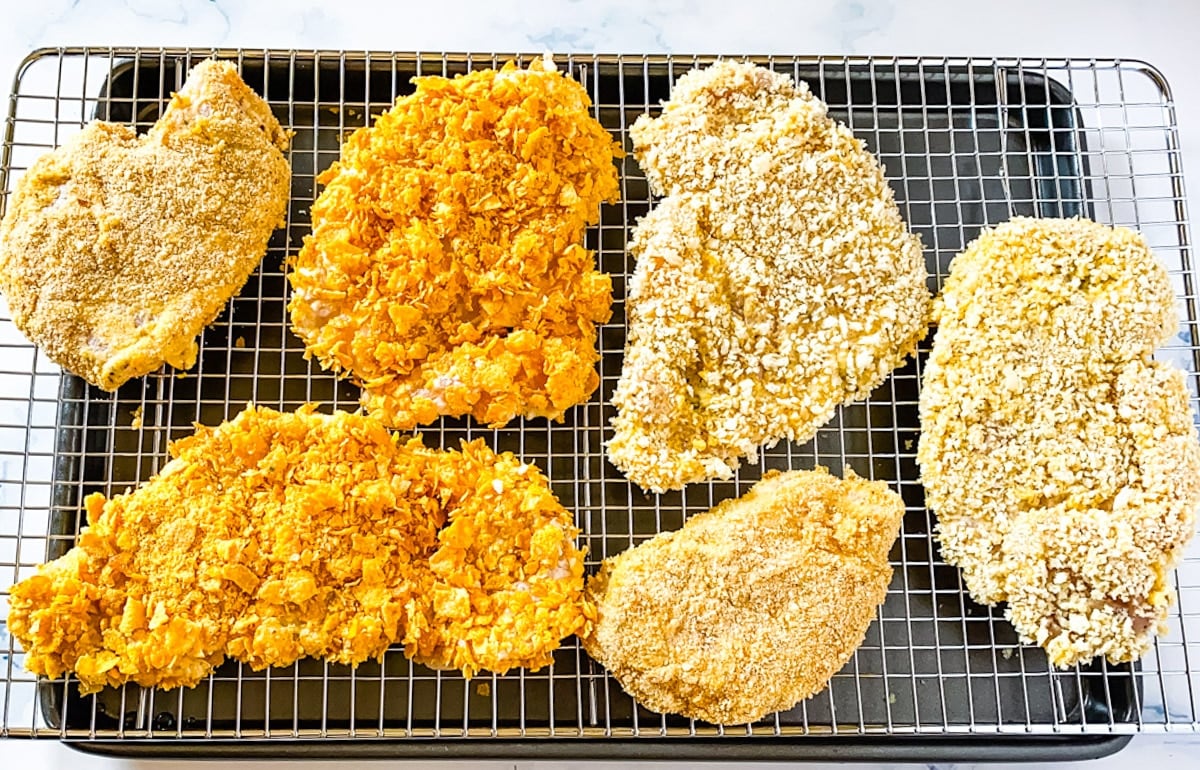
As you can see in the image below, I've done a comparison of fried versus baked for all three types of bread coatings. There was minimal difference in the crispiness, so it comes down to your preference. The baked cutlets, were a little lighter in color as opposed to the fried ones.
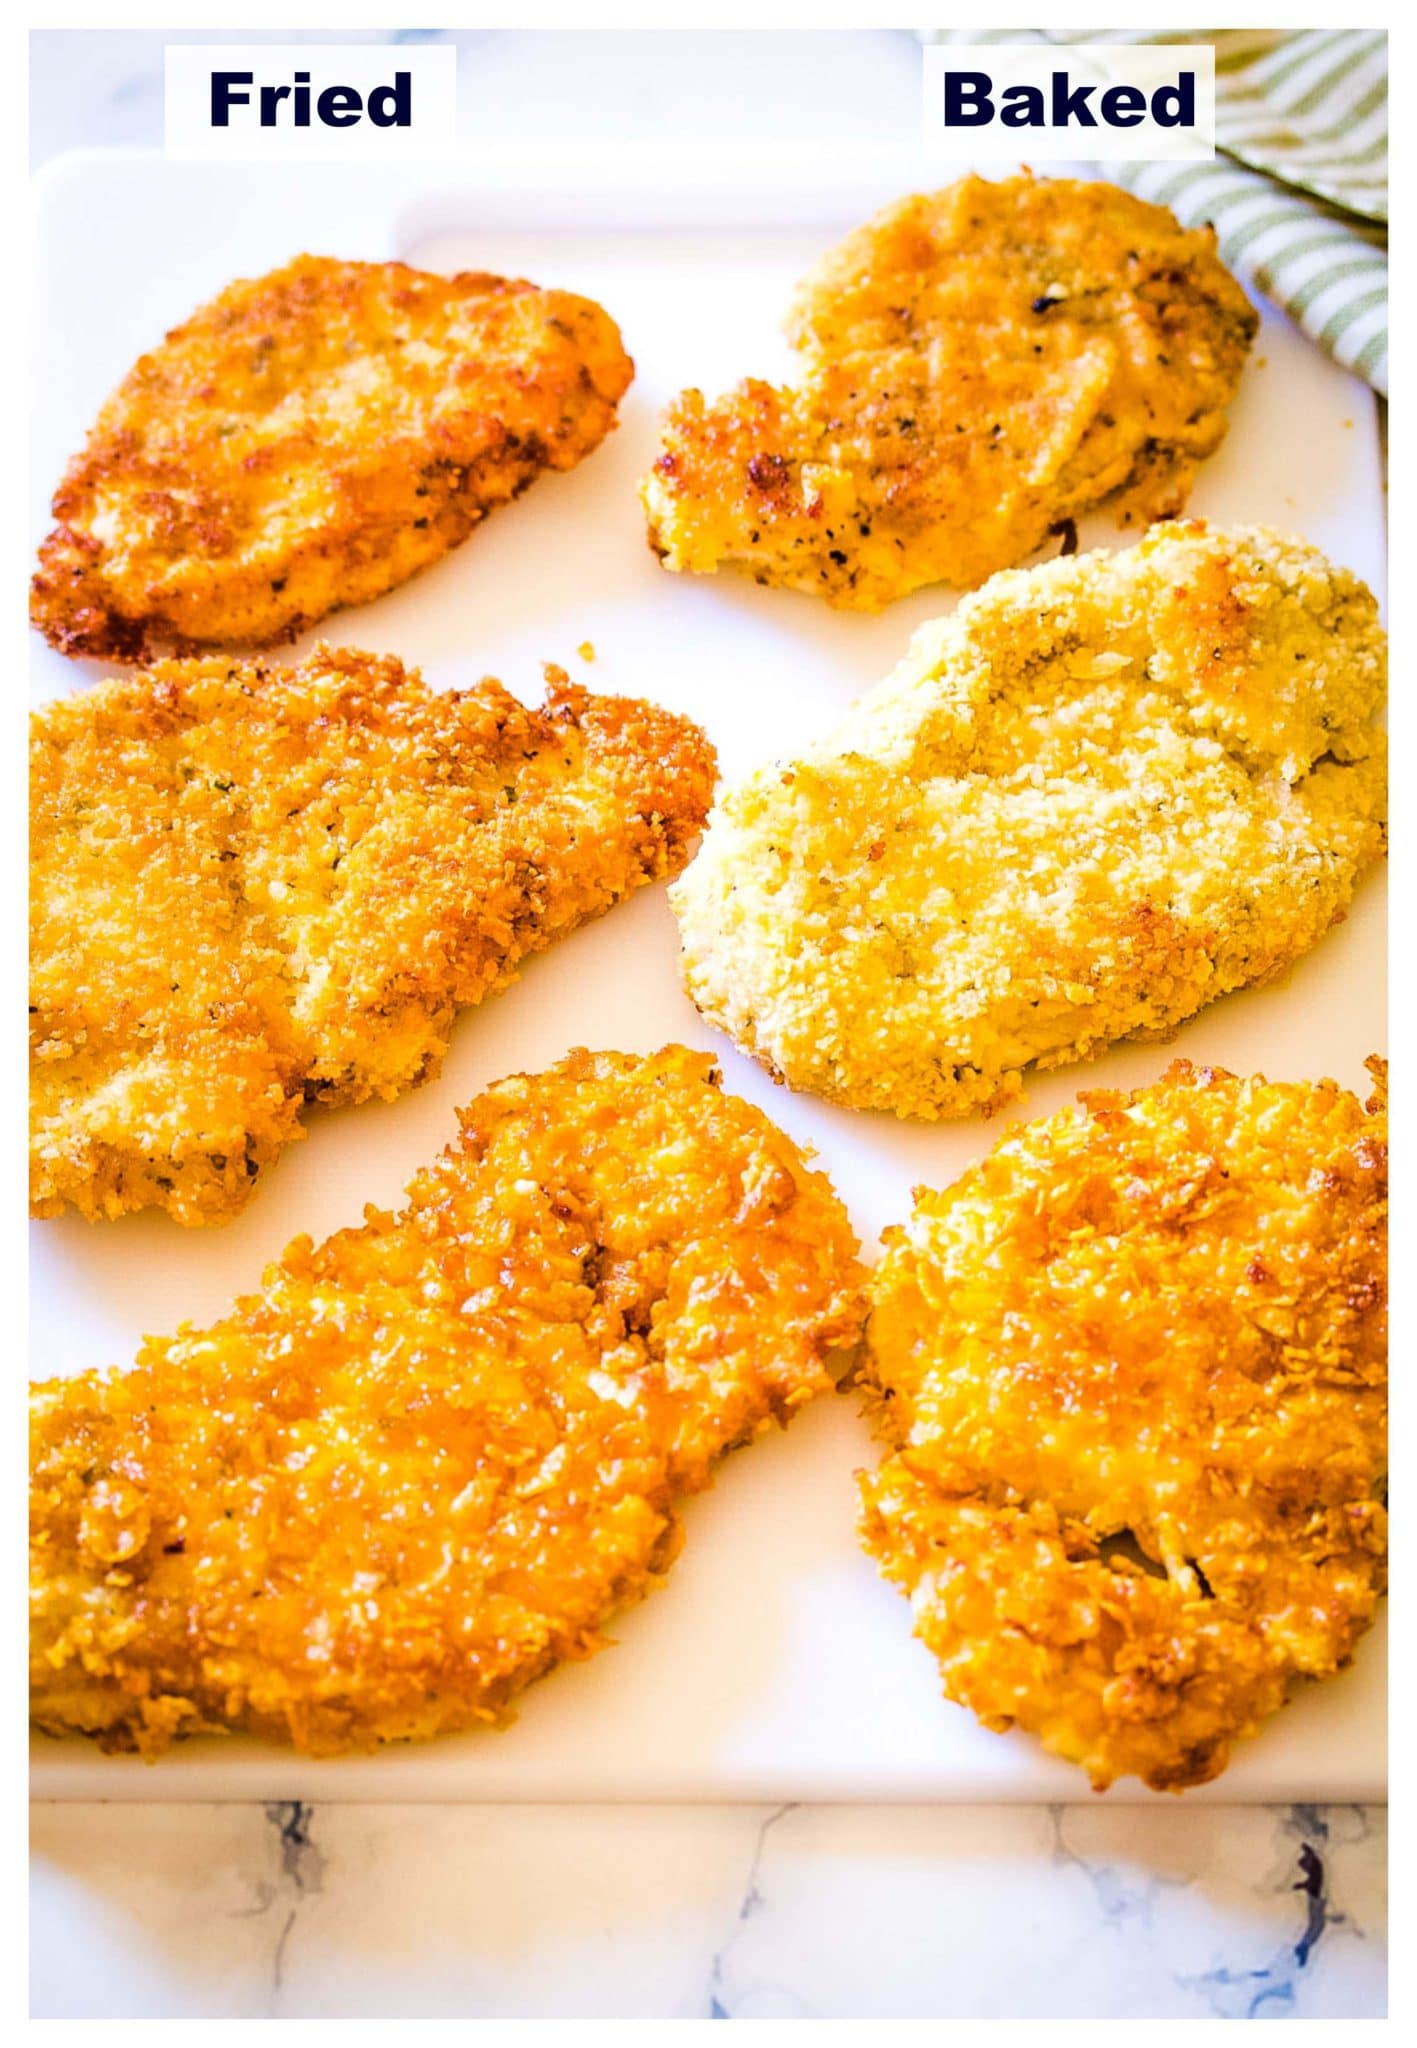
The plain breadcrumbs cutlets were perhaps the most fussy to bake, because they kept sticking to the aluminium foil, however that was easily solved by using parchment paper instead of foil!
What You'll Need
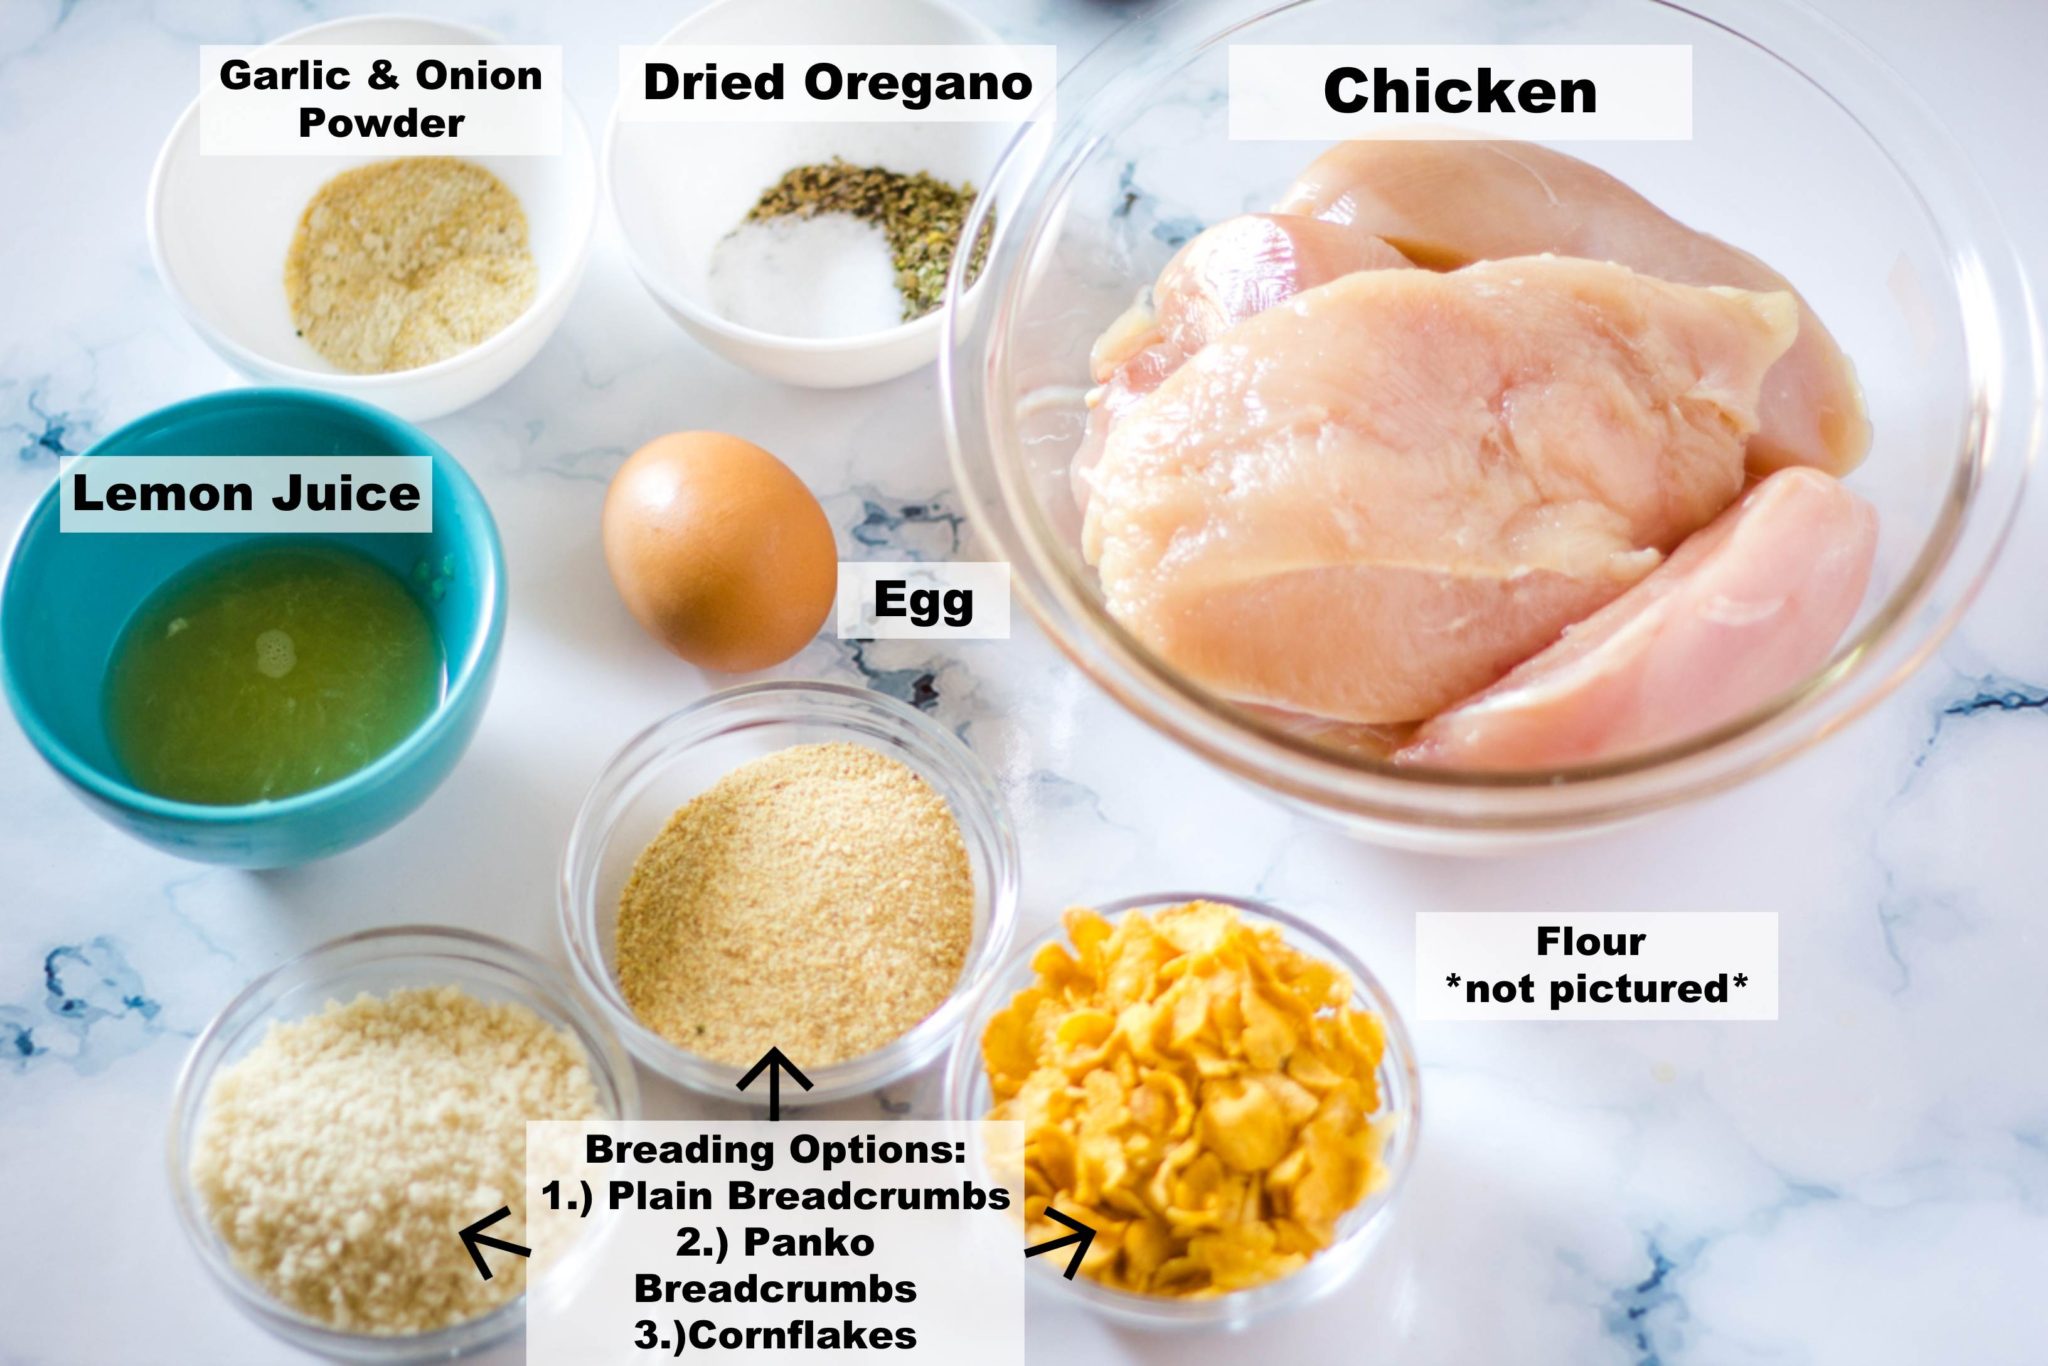
1.) For the Chicken Marination
I highly recommend marinating the chicken because it not only makes it flavorful, but it also makes it very juicy!
- Chicken: flatten with a kitchen mallet or rolling pin.
- Fresh lemon juice: please only use fresh lemon juice, and not the bottled kind.
- Dried oregano, garlic powder, onion powder, salt and pepper: for extra flavor.
2.) For the Breading
The breading process is pretty standard, and I highly recommend using all three so that the coating adheres fully to the cutlets. Remember to season all three with salt and pepper because it makes a huge difference in the taste.
- Flour
- Eggs
- Breadcrumbs of your choice: plain breadcrumbs, panko breadcrumbs, OR cornflakes
How to Make Breaded Chicken Cutlets
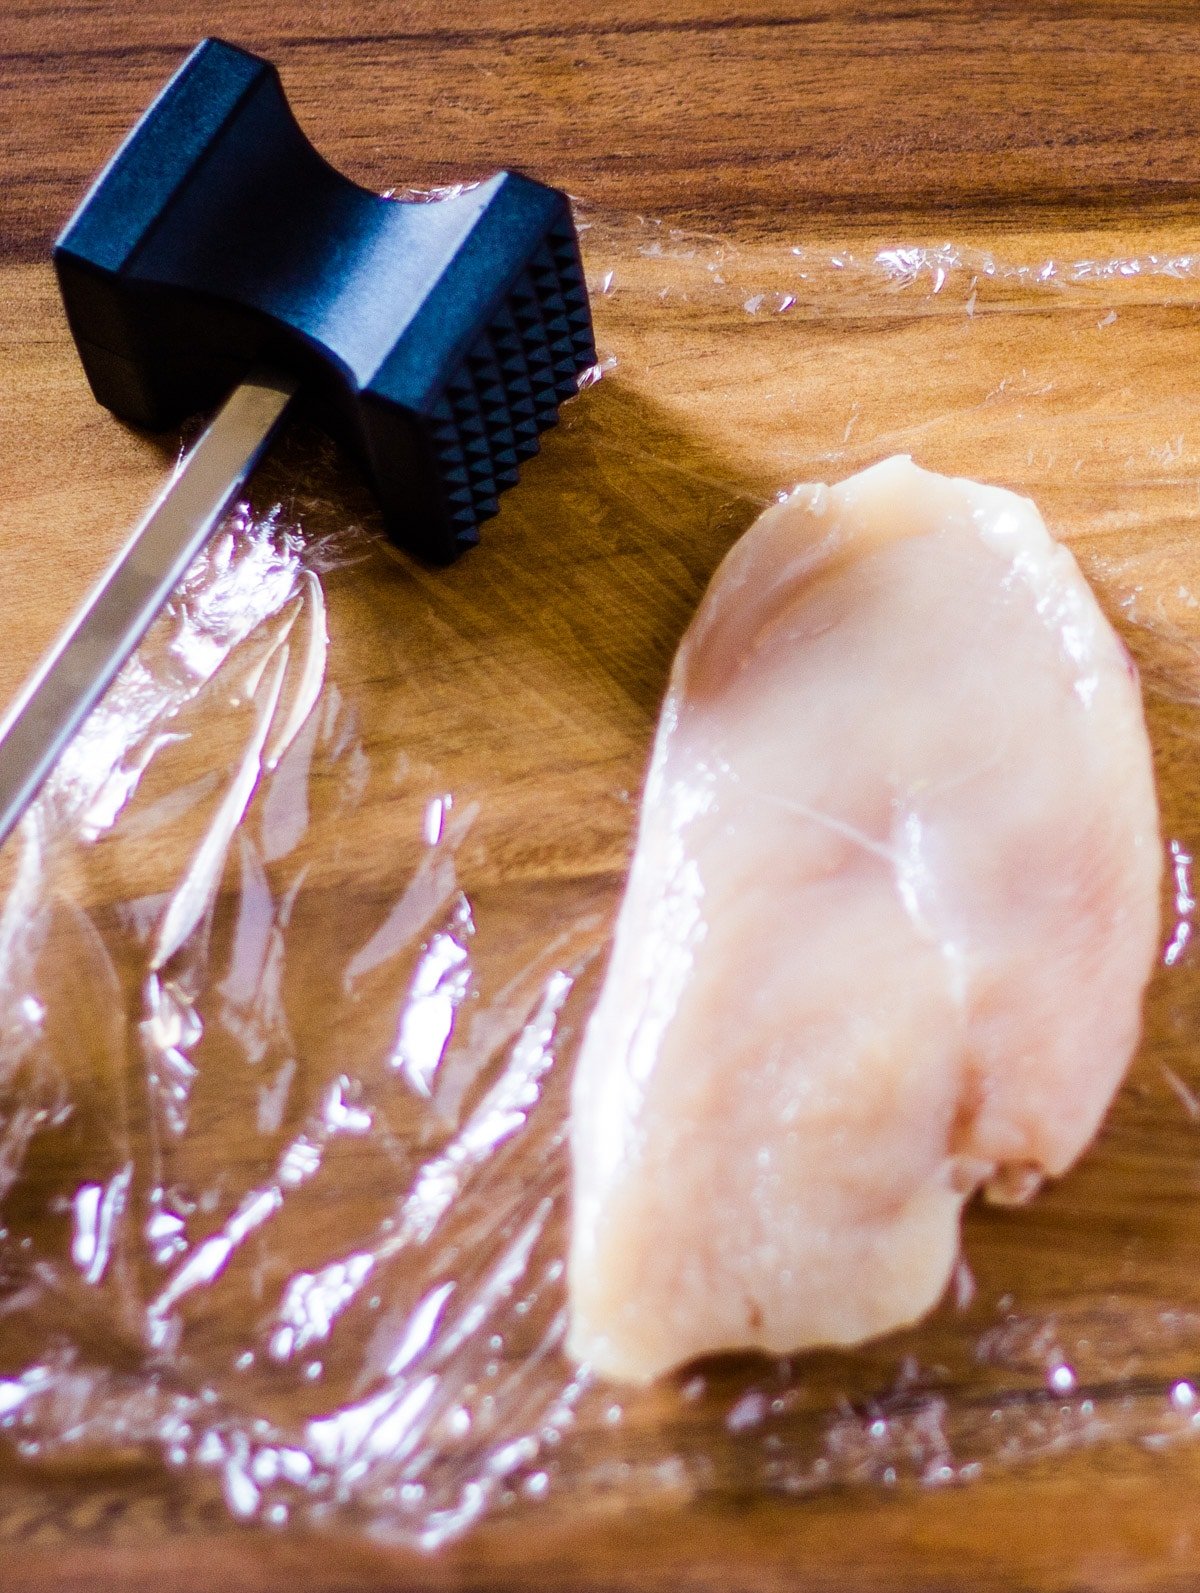
STEP 1: Flatten the Chicken:
On a cutting board, place the chicken breast and cover with cling film. Using a kitchen mallet or rolling pin, flatten the chicken until it is 1/2 inch in thickness.
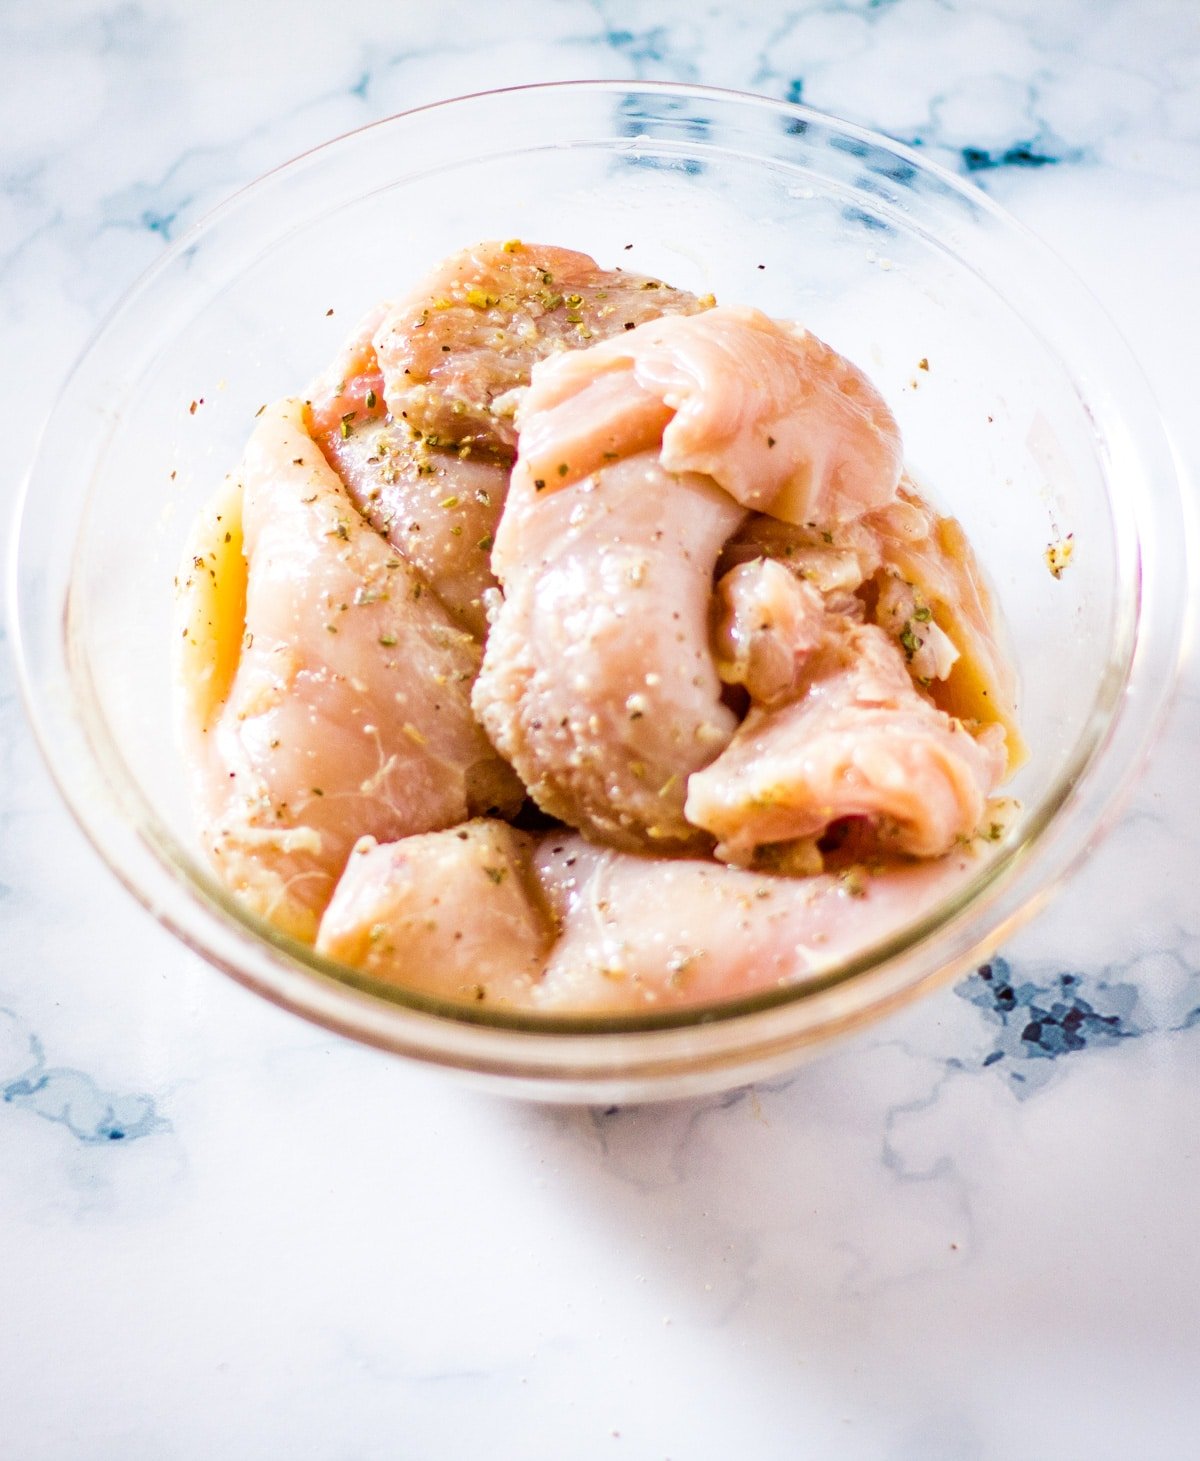
STEP 2: Marinate
Add all the marinade ingredients to the chicken and mix until combined. Set aside for 15 minutes while you set up the breading station. Alternative you can marinate up to 24 hours in the fridge.
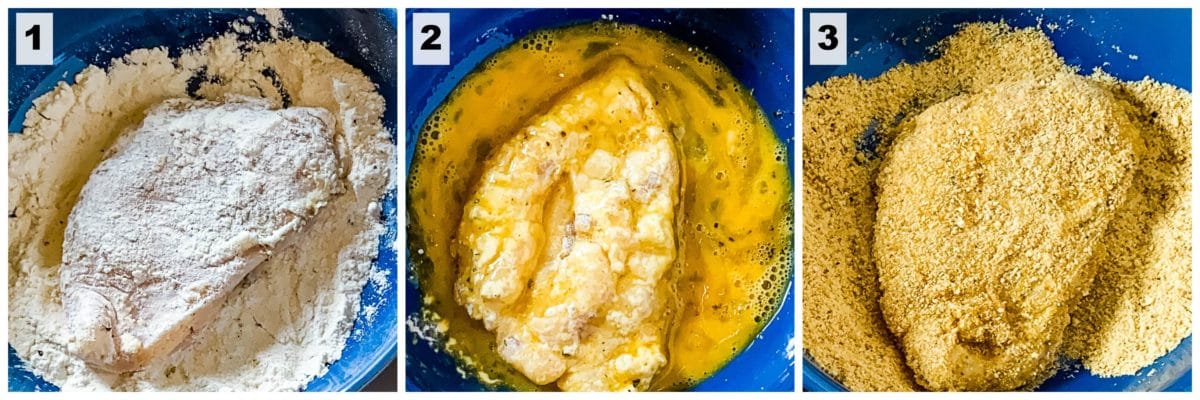
STEP 3: Breading Process
- Dip each piece of chicken breast, first into the flour, coating it evenly. Dust off excess flour, then dip into the whisked eggs, letting the excess drip back into the bowl, and finally coat evenly with breadcrumbs.
STEP 4: Bake OR Shallow Fry the Cutlets:
- To Bake: Preheat the oven to 180 C and line a baking tray with parchment paper. Lightly spray with oil, and place the breaded cutlets onto the tray. Spray with a little bit of oil, and bake for 15-20 minutes until cooked through.
- To Shallow Fry: The trick to perfectly juicy and crispy cutlets is to shallow fry them on medium high heat. To check the oil, add a few breadcrumbs to it; they should sizzle gently. Cook on each side for 3-4 minutes, until golden brown. Cooking time will vary upon the thickness of the cutlet. Note: The temperature of the oil matters greatly, too hot or too cold, and the cutlets won't cook properly.
Success Tips & FAQs
It is just a thin piece of chicken breast. You can either slice a chicken breast into half, lengthwise OR use a kitchen mallet to flatten the chicken.
Use my three stage breading process: dip in to flour, then into egg, and finally coat with breadcrumbs. This yields an even coating, that doesn't fall off while frying or baking.
Yes, absolutely! For freezing I lay the breaded cutlets onto a parchment lined plate in a single layer. Then flash freeze for about 1-2 hours, until semi-solid, and transfer to a ziplock bag and freeze for up to 1 month.
I highly recommend seasoning all three layers of the breading process, as it makes a huge difference in the taste.
After breading the cutlets, place them in the fridge for about 30 minutes, it will help them dry out a bit. This will ensure in a crispy coating, while being cooked on medium high heat.
I've noticed that sometimes the breaded chicken sticks to the foil or baking tray even if it's greased well. To overcome this, I recommend using parchment paper instead.
According to FDA recommendations, chicken is cooked when it reaches an internal temperature of 165 F (73.9 C). Or just cut it in half, and the meat should be white and the juices should run clear.
Related Recipes
Note: This recipe was initially published in May 2016, and has been updated for step by step pictures of the recipe, and more detailed recipe instructions! It was originally published with this Creamy Garlic Pasta Recipe.
Crispy Breaded Chicken Cutlets
Equipment
- Kitchen mallet
- Cutting board
- Knife
- Frying pan
- Tongs
Ingredients
- For the Chicken Marinade:
- 500 grams chicken breasts
- Juice of half a lemon
- 1 tsp salt
- 1/2 tsp black pepper
- 3/4 tsp dried oregano
- 1 tsp garlic powder
- 1 tsp onion powder
- For the Breading:
- 2 eggs lightly whisked
- 2 cups all purpose flour or as needed
- 2-3 cups plain breadcrumbs (or panko or cornflakes)
- 1/4 cup oil (for shallow frying)
Instructions
Prepare the Chicken Breasts
- Using a kitchen mallet or rolling pin, flatten the chicken until it is about 1/2 inch in thickness.
Marinate the Chicken
- In a mixing bowl, marinate the chicken with lemon juice, salt, pepper, dried oregano, garlic powder and onion powder. Marinate for at least 15 minutes or up to 24 hours.
Breading the Chicken Cutlets
- Place the flour, eggs, and breadcrumbs (choose from panko, plain breadcrumbs Or cornflakes) in three separate shallow dishes. Make sure to season all three layers, as this results in a very flavorful cutlet.
- Dip each chicken breast in flour, lightly shaking the excess flour. Gently dip it in the egg wash and then coat with breadcrumbs. Repeat until all chicken cutlets are coated with breadcrumbs. Tip: If using cornflakes, crush them first so they adhere to the cutlets easily. I do this by placing the cornflakes in a ziplock bag and gently bash them with a rolling pin.
Frying the Chicken Cutlets
- Heat oil to medium high in a frying pan, and fry the chicken breasts until golden brown (for about 4-5 minutes on each side or until cooked through and internal temperature reaches 165 F / 73.9 C). Cooking time will vary according to thickness of the cutlets.
Baking the Chicken Cutlets
- Preheat oven to 200 C, and line a baking tray with parchment paper. Spray it lightly with oil, then place the breaded cutlets on to it. Lightly spray the top with oil. Bake for 15 minutes or until cooked through, flipping sides once in between.
- Transfer cooked cutlets onto a cooling rack. This will ensure the bottom of the cutlets do not get soggy.
- Serve with this Creamy Garlic Pasta.
Notes
- NOTE: This recipe was originally published with this Creamy Garlic Pasta recipe.
- Prepare the Chicken Breasts: If your chicken breasts are large, then you may have to first slice the chicken breasts into half lengthwise and then flatten with a kitchen mallet or rolling pin. The chicken breasts I used were small, so I only flattened them with a kitchen mallet.
- Marination: I highly recommend marinating the chicken as it yields a very flavorful and juicy chicken cutlet. Minimum marination time: 15 minutes. The longer you marinate, the more flavorful it will be.
- Choose your breadcrumbs: You can use plain breadcrumbs, panko breadcrumbs OR cornflakes. My favorite result was with the cornflakes crusted cutlets as they were very flavorful, and remained crispy for hours whether they were baked or fried. My least favorite of the three options was plain breadcrumbs.
- Season all the layers of the breading stage with salt & pepper: the flour, the eggs and the breadcrumbs. This ensures in a really flavorful cutlet as compared to a bland one.
- How to ensure the breading doesn't fall off: Coating with flour, eggs and then breadcrumbs ensures that the breading does not fall off.
- Amount of Oil for Shallow Frying: the oil should be about 1/2 inch in depth. We are not aiming for deep fried here.
- Shallow Fry on Medium Heat: to check if the oil is ready, drop in a pinch of breadcrumbs, they should gently sizzle, and should not turn brown quickly (see in video). Fry on both sides for 4-5 minutes until golden brown and done. Cooking time will depend on the thickness of the cutlets, however. The thicker the cutlets, the longer they'll take to cook.
- Baking Tips: Prepare your baking tray by lining it with parchment paper OR foil. Lightly spray with oil, and place the breaded cutlets onto it. Lightly spray oil over the cutlets as well. I prefer parchment paper over foil, as sometimes the cutlets can stick to the foil.
- How to check for doneness: According to FDA recommendations, cooked chicken should reach an internal temperature of 165 F, when a kitchen thermometer is inserted into the thickest part of the breast. You can also check for doneness by slicing the cutlet into half. The meat should be white, and the juices should run clear.
- Make that crispiness last for longer: Place cooked chicken cutlets on a cooling rack instead of a paper towel lined plate. This ensures that the chicken does not get soggy on the bottom, as this allows the air to circulate. Resulting in total crispy factor!
- Storage: Cooked chicken cutlets can be stored in the fridge in airtight container for up to 1-2 days. However, they won't remain as crispy as they are when fresh. They still taste delicious!
- Freezing: To freeze the uncooked breaded chicken cutlets, first flash freeze them in a single layer on a parchment lined tray. When they are semi solid, transfer them to a ziplock bag and freeze up to 1 month.

We like crispy battered or crumbed fish from shops but concerned about their unhealth or re-used oil etc. So I want to make at home & I prefer chicken. But my question is can you do in Air fryer? Is there fear the coating will burn & chicken inside not fully cooked? Shall I pre-cook chicken first?
IIs there any problem using this recipe to make chicken parm? Can I just bake the chicken and add cheese at the end of the baking process?
Hi Larry. Yes, I think that should be okay to do so.
Where did the recipe for the creamy garlic pasta go?? 😢
Hi Kelly,
I've recently moved that recipe to it's own post. Here's the link: https://ikneadtoeat.com/creamy-garlic-pasta/
Hope this helps and apologies for the inconvenience!
Thanks
Wajeeha